Step 1: Create an Account
Go to Mondido.com and create a free account.
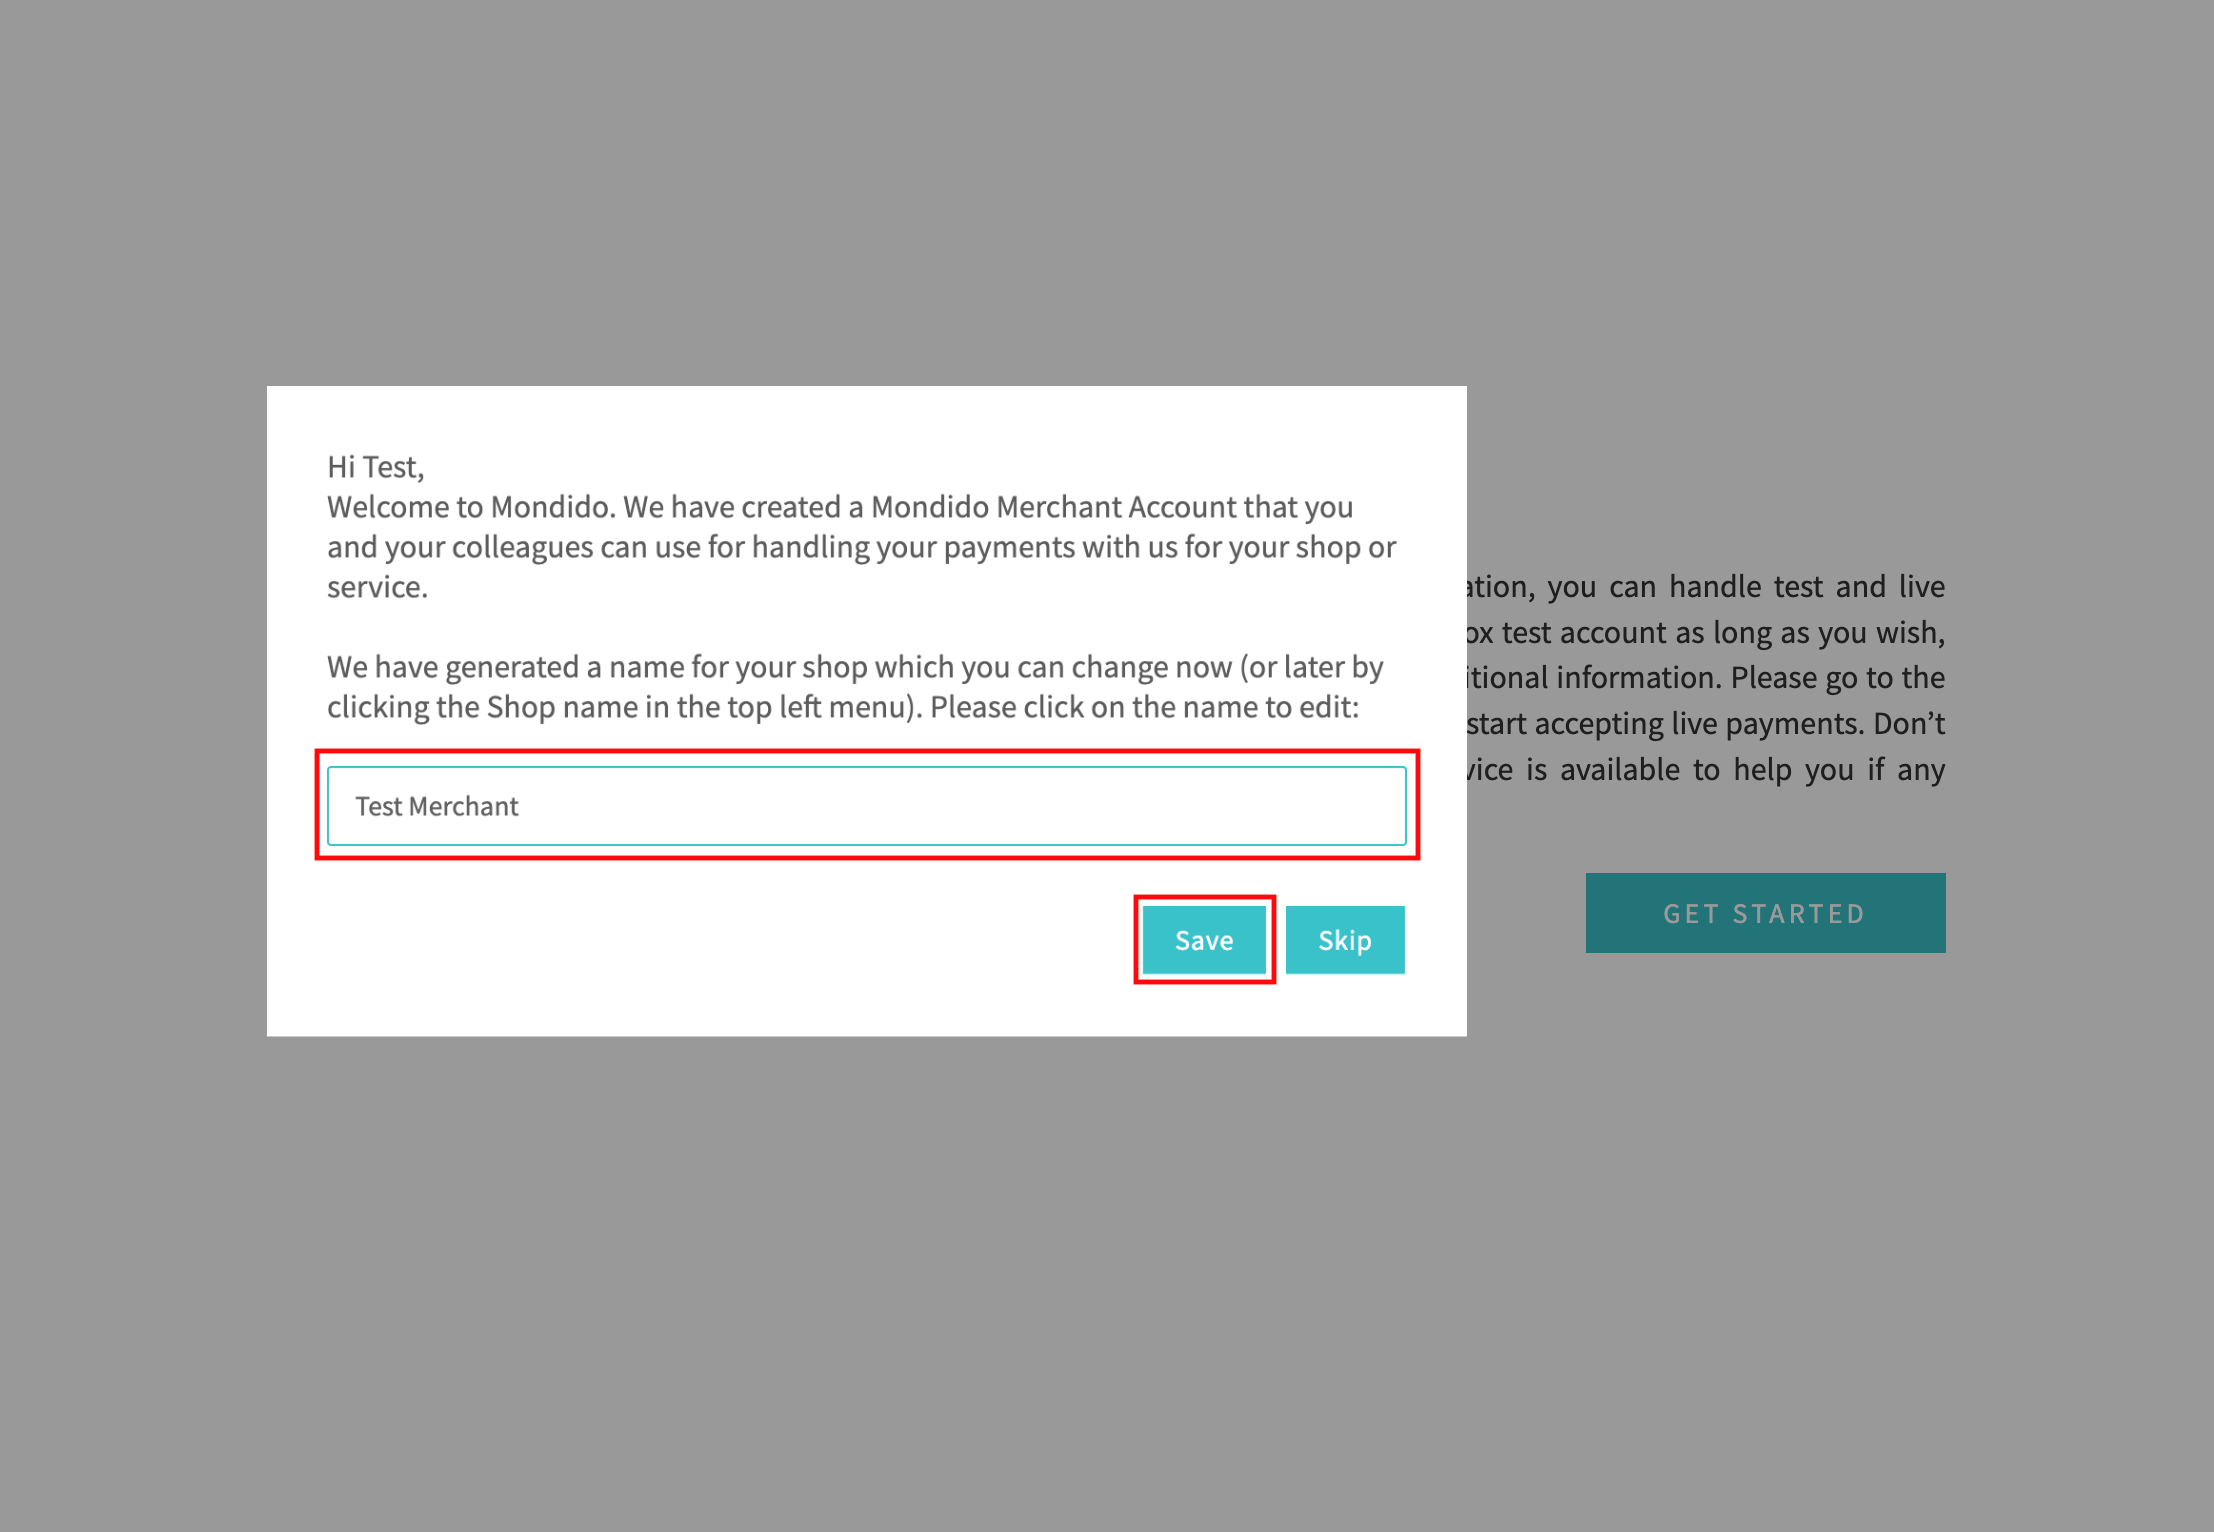
After creating your account, you’ll see a dashboard like the image below:
Add your shop name and click Save.
Click Get started.
Step 2: Complete Onboarding Form
To start taking live payments, you must complete Mondido’s onboarding process.
If onboarding doesn’t appear automatically, go to Account details in the left-hand menu.
Fill in all the required fields as described below.
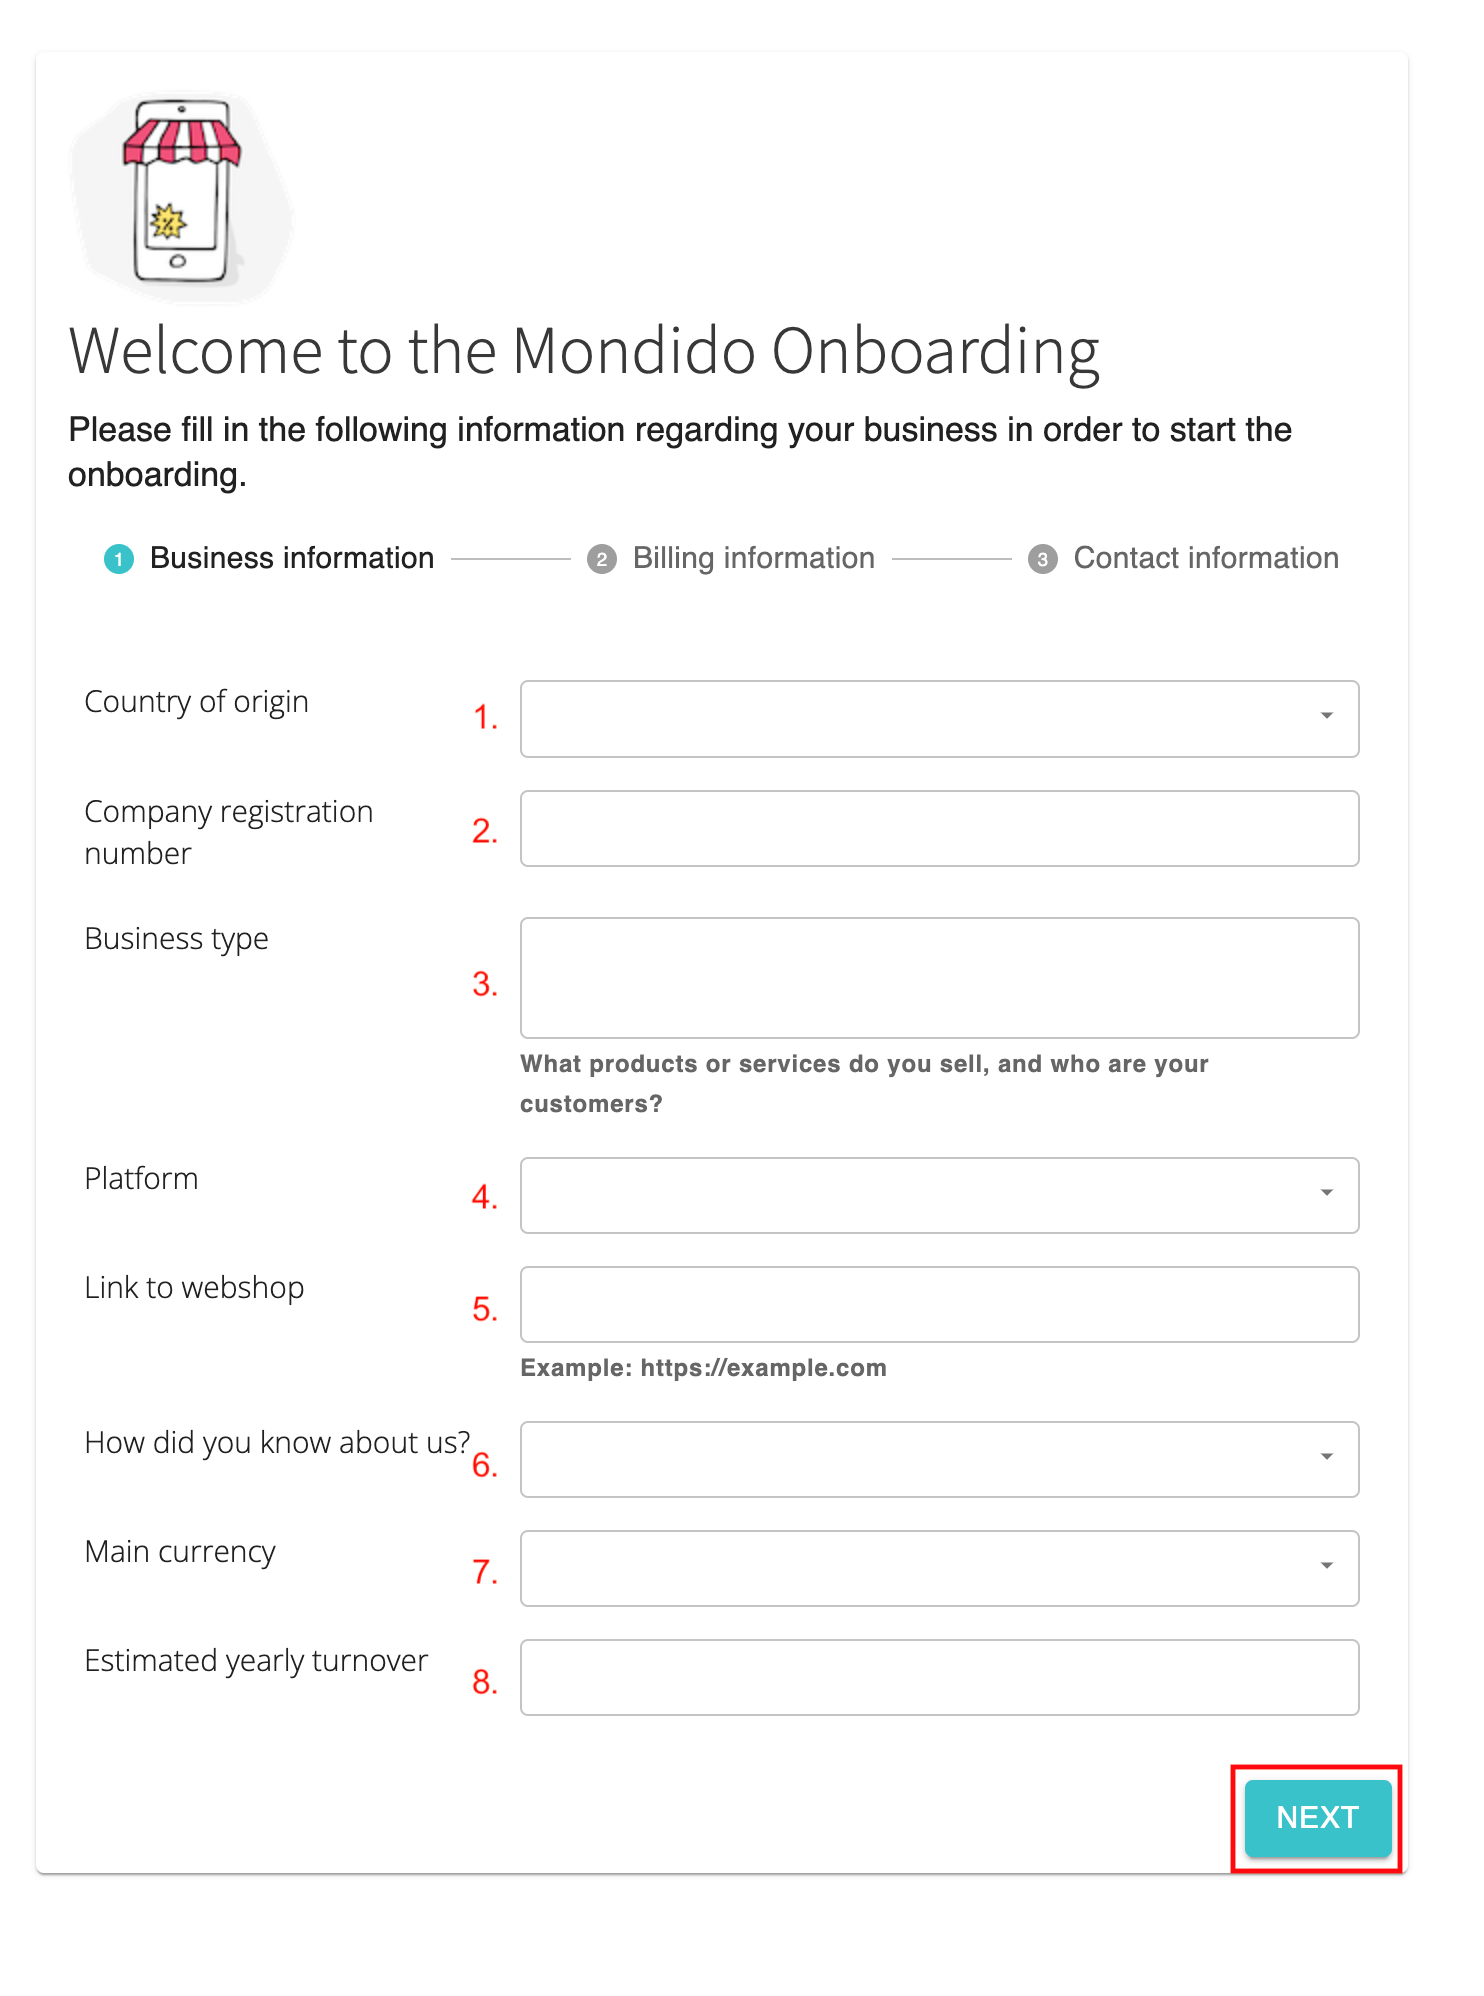
Onboarding Form
Section 1: Company Information
Country of origin (select from dropdown).
Company registration number.
Business description: what you sell and your customer type (e.g., “We sell clothes to private individuals”).
Webshop platform (select from dropdown).
Webshop URL. (If not live yet, provide a test link so we can review your shop.)
How you found Mondido (select from dropdown).
Main transaction currency. (If multiple, enter the primary one here.)
Estimated yearly turnover (numbers only, in your main currency).
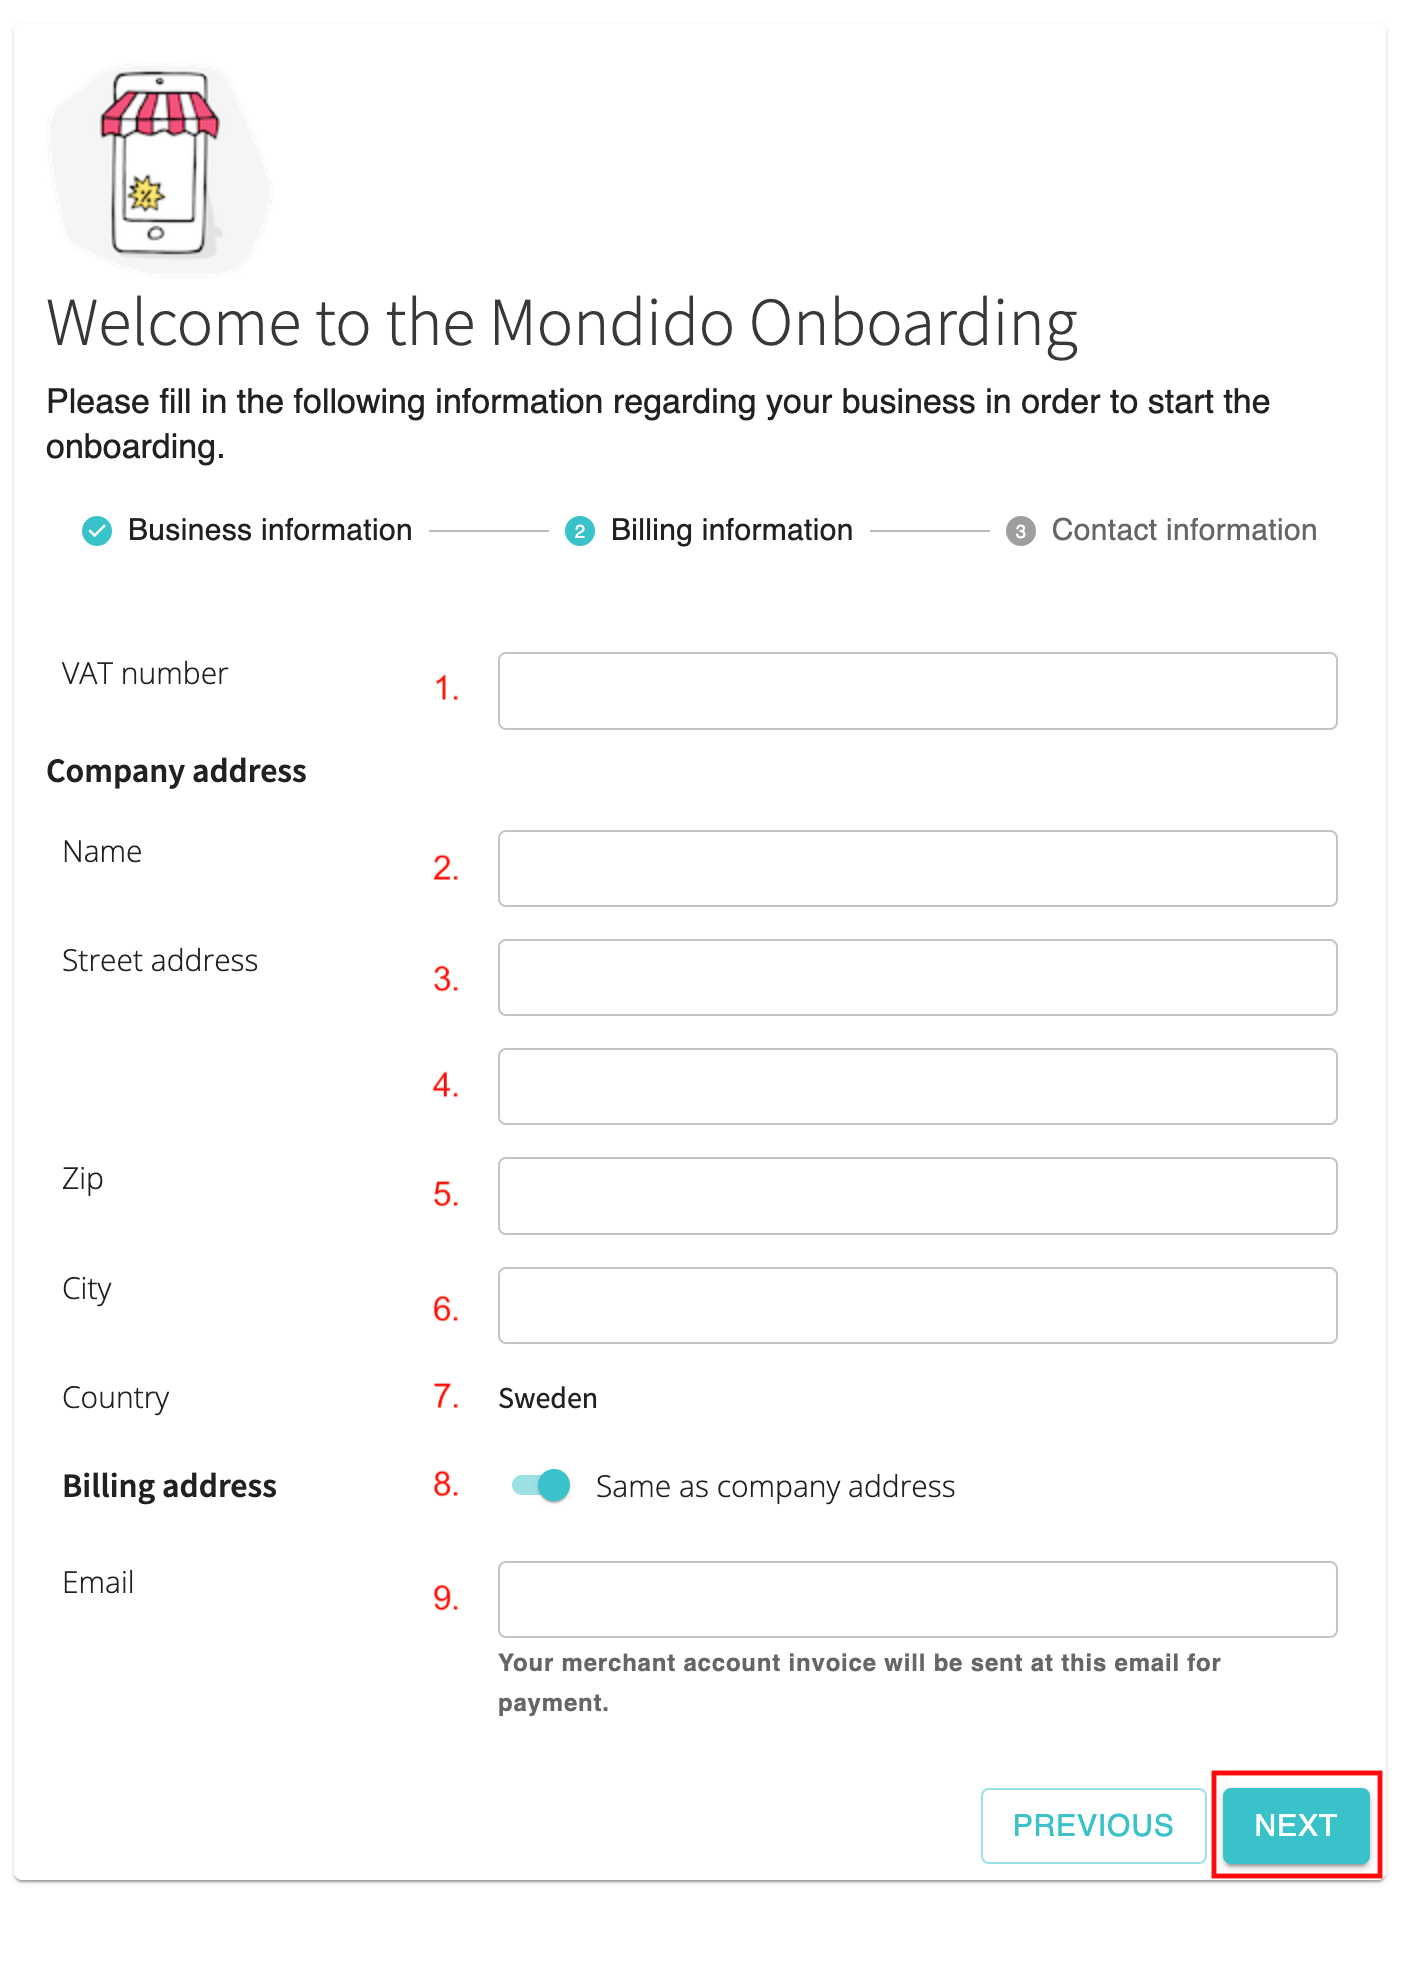
Section 2: Company Details
VAT number.
Legal company name.
Registered company address.
Add extra lines if needed.
Zip code and city.
Country (auto-filled from Section 1).
If billing address differs, deselect Same as company address and fill in invoice details.
Billing email address.
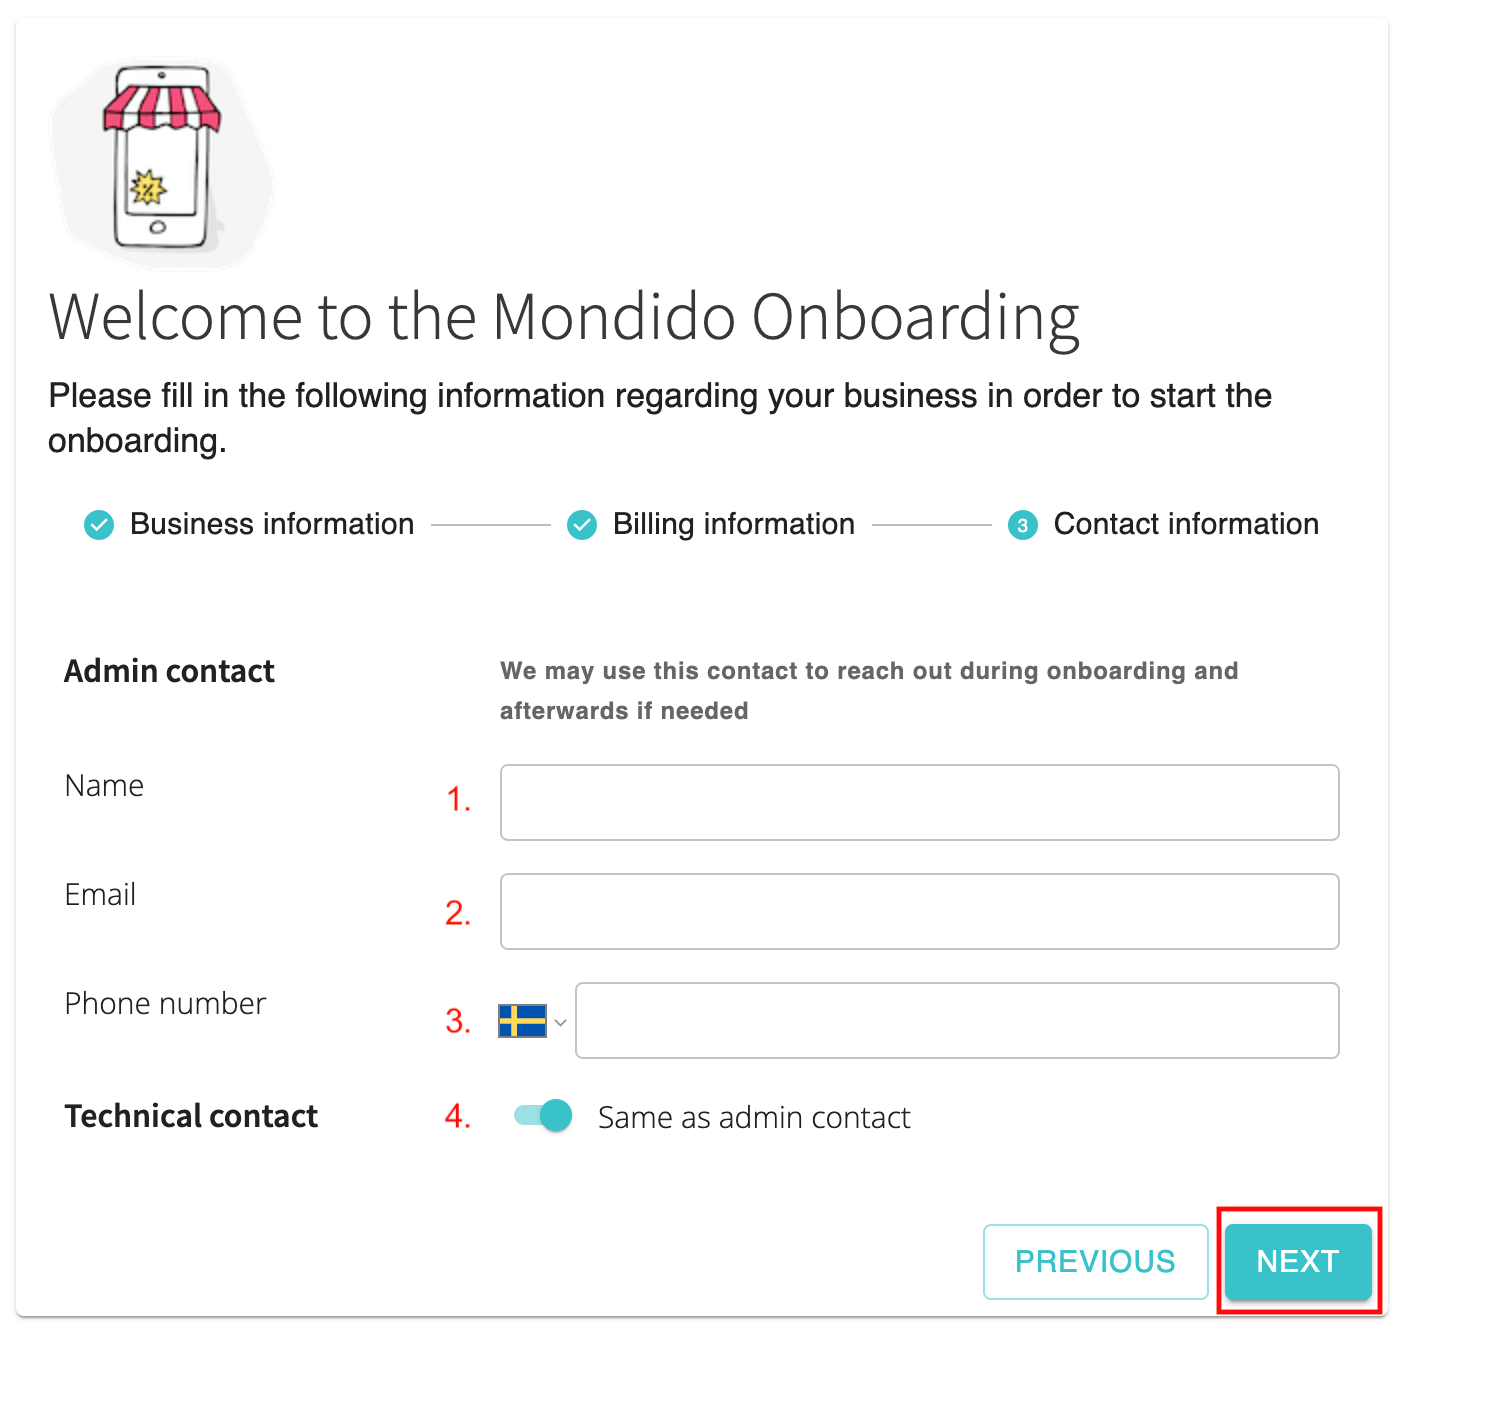
Section 3: Contact Information
Contact person’s first and last name.
Contact person’s email address (ensure this is actively monitored).
Contact person’s phone number (so we can reach you if email isn’t answered).
Technical contact (optional): If different from admin, deselect Same as admin contact and provide details.
Step 3: Payment Method Onboarding
After completing the general onboarding, you’ll be directed to payment method onboarding.
Use the guides below for step-by-step help:
Was this article helpful?
That’s Great!
Thank you for your feedback
Sorry! We couldn't be helpful
Thank you for your feedback
Feedback sent
We appreciate your effort and will try to fix the article