To control what data is included in the report, you use a report template. The template determines which transactions are included and what information (columns) will appear in the report.Creating a report template
? Creating a Report Template
-
Log in to your Mondido account.
-
In the left-hand menu, click “Reports.”
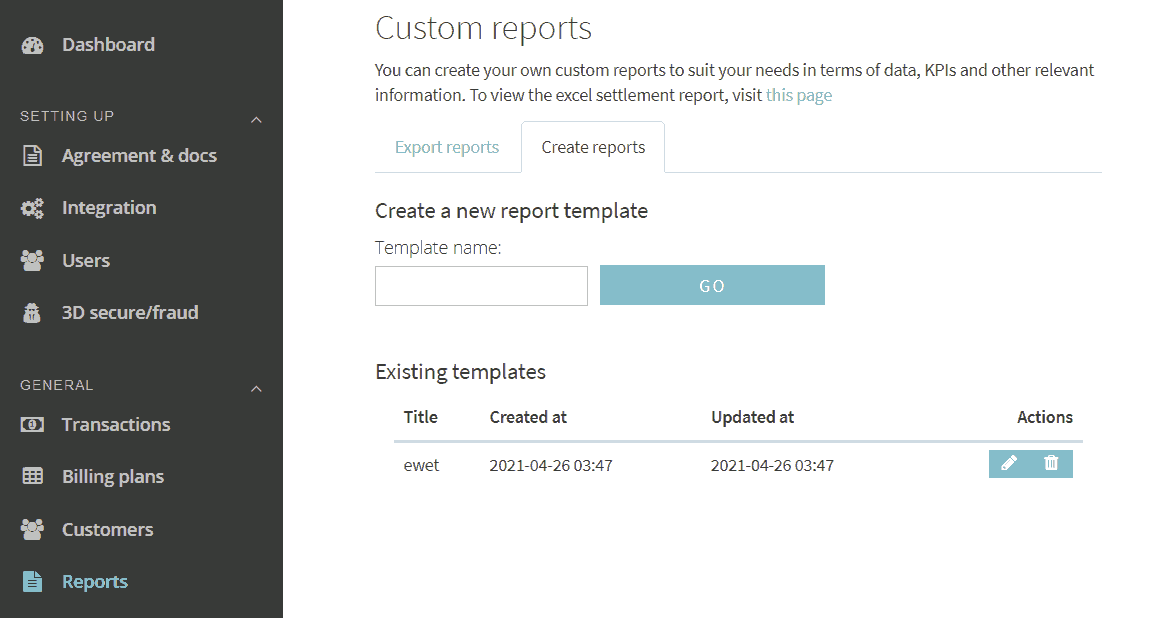
Here, you can view your existing templates or create a new one.
To create a new template:
-
Enter a name in the “Template name” field.
-
Click “GO.”
If you already have templates, you can:
-
Edit them by clicking the pencil icon ✏️
-
Delete them using the trash can ?
? Customizing Columns
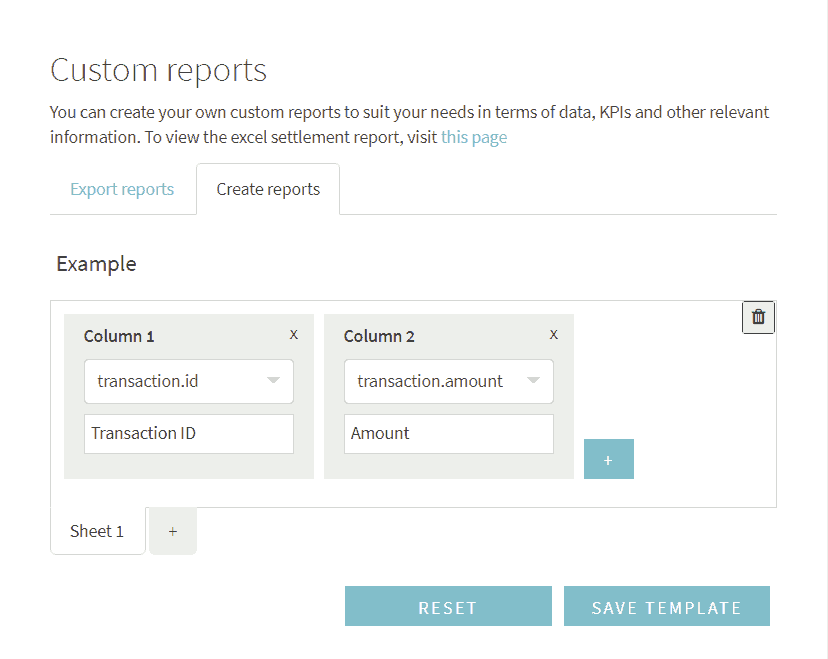
Each gray box labeled “Column” represents one parameter that will become a column in your report.
-
Add new columns by clicking the plus sign (+).
-
Change column order by dragging and dropping.
-
Delete a column by clicking the X in the top-right corner of the column box.
Each column pulls data from a dropdown menu of available transaction parameters. These match the fields you see in your transaction list.
? Here’s a guide on how to fetch data from the transaction object
When you're done, click “Save template” to store your custom template.
 Each gray box titled "Column" represents a parameter that will become a column in the report. You can add more columns by pressing the plus sign button. The order of the columns can be changed by dragging and dropping them. To delete a column, press the x in the top right corner of the column box.
Parameters can be selected from a dropdown list. You can find these in the data of transactions from the transaction list.
Here's a guide on how to fetch data from the transaction object
Press "Save template" to save the template.
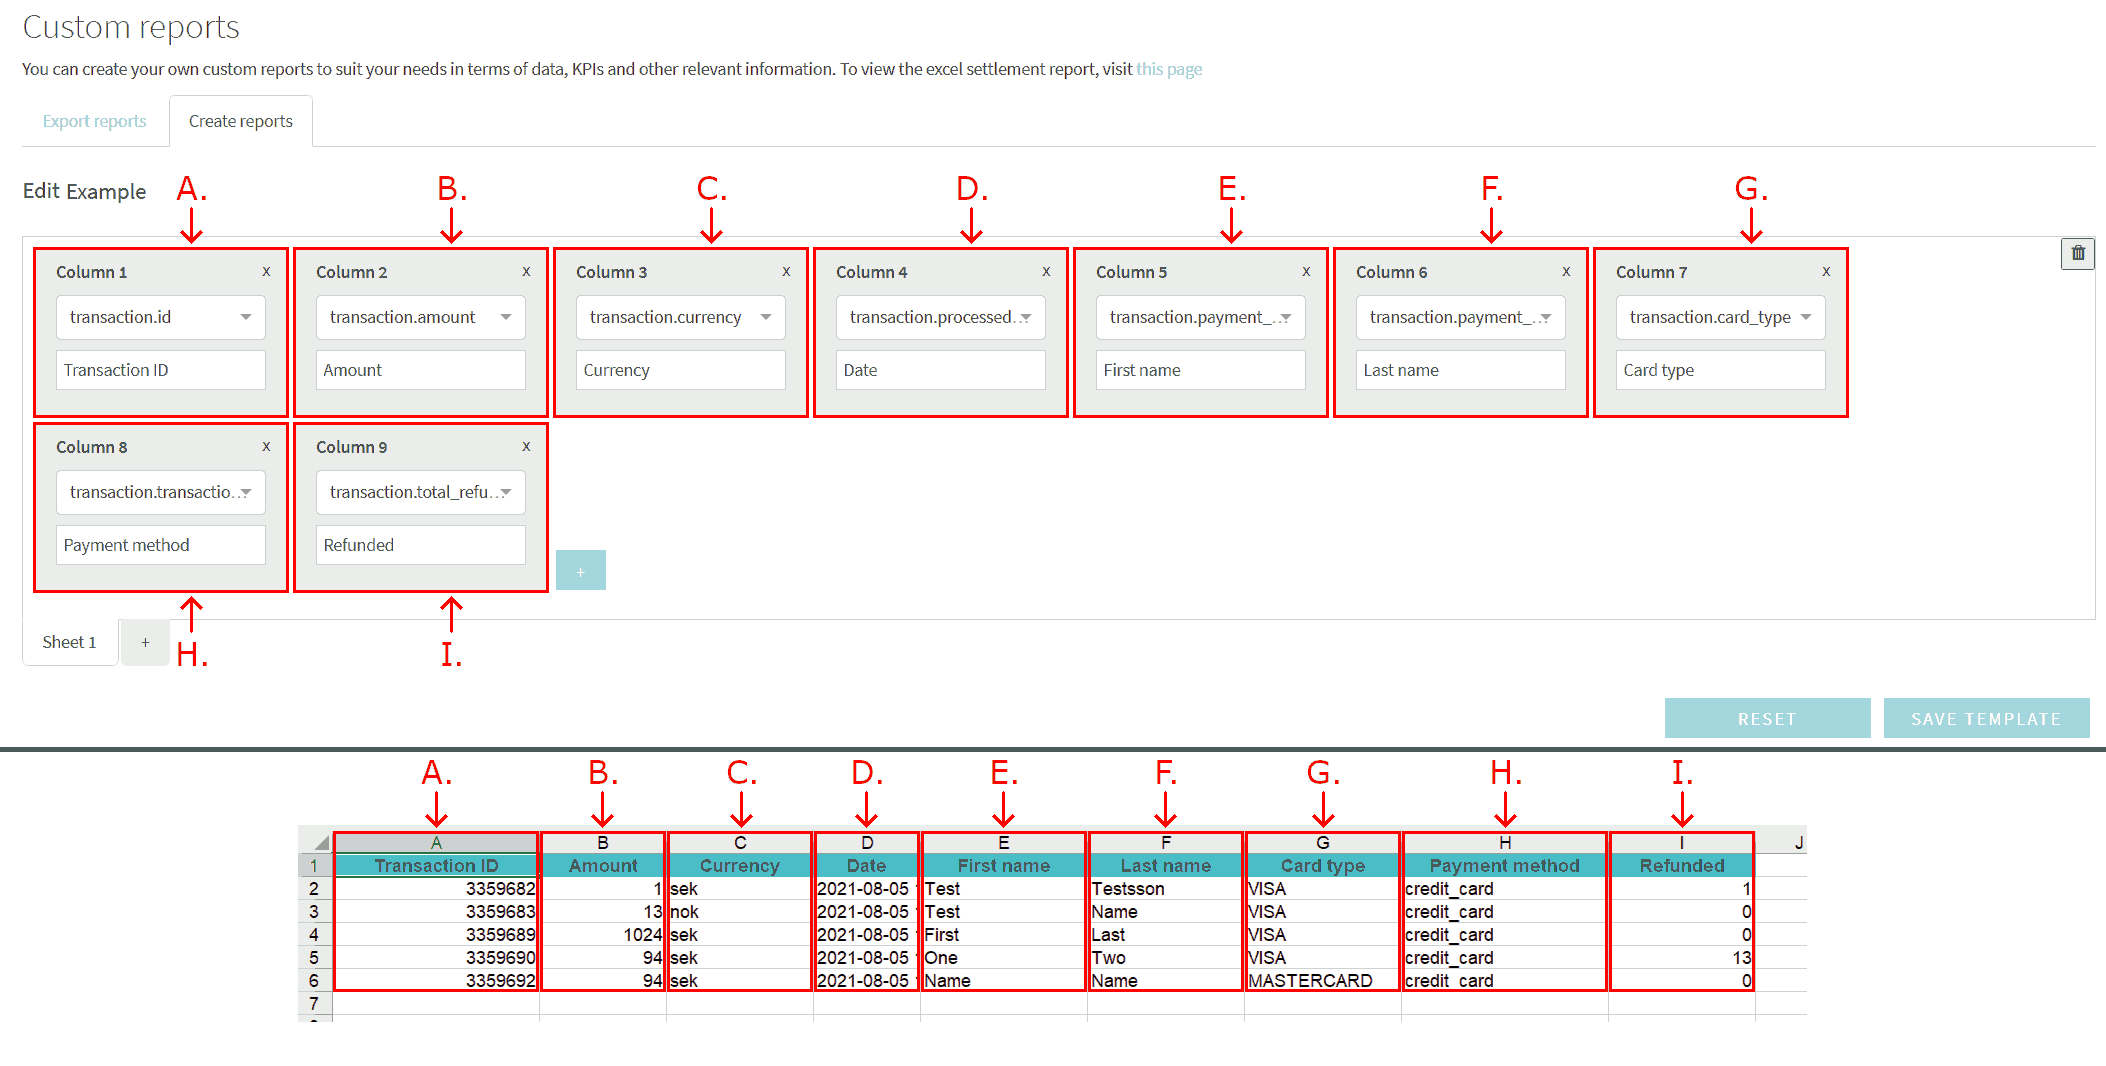
? Example Report
To help you get started, we’ve included an example template and its resulting report:
? Exporting Reports
Now that you have a template, here’s how to generate a report file:
-
Go to the “Export reports” tab.
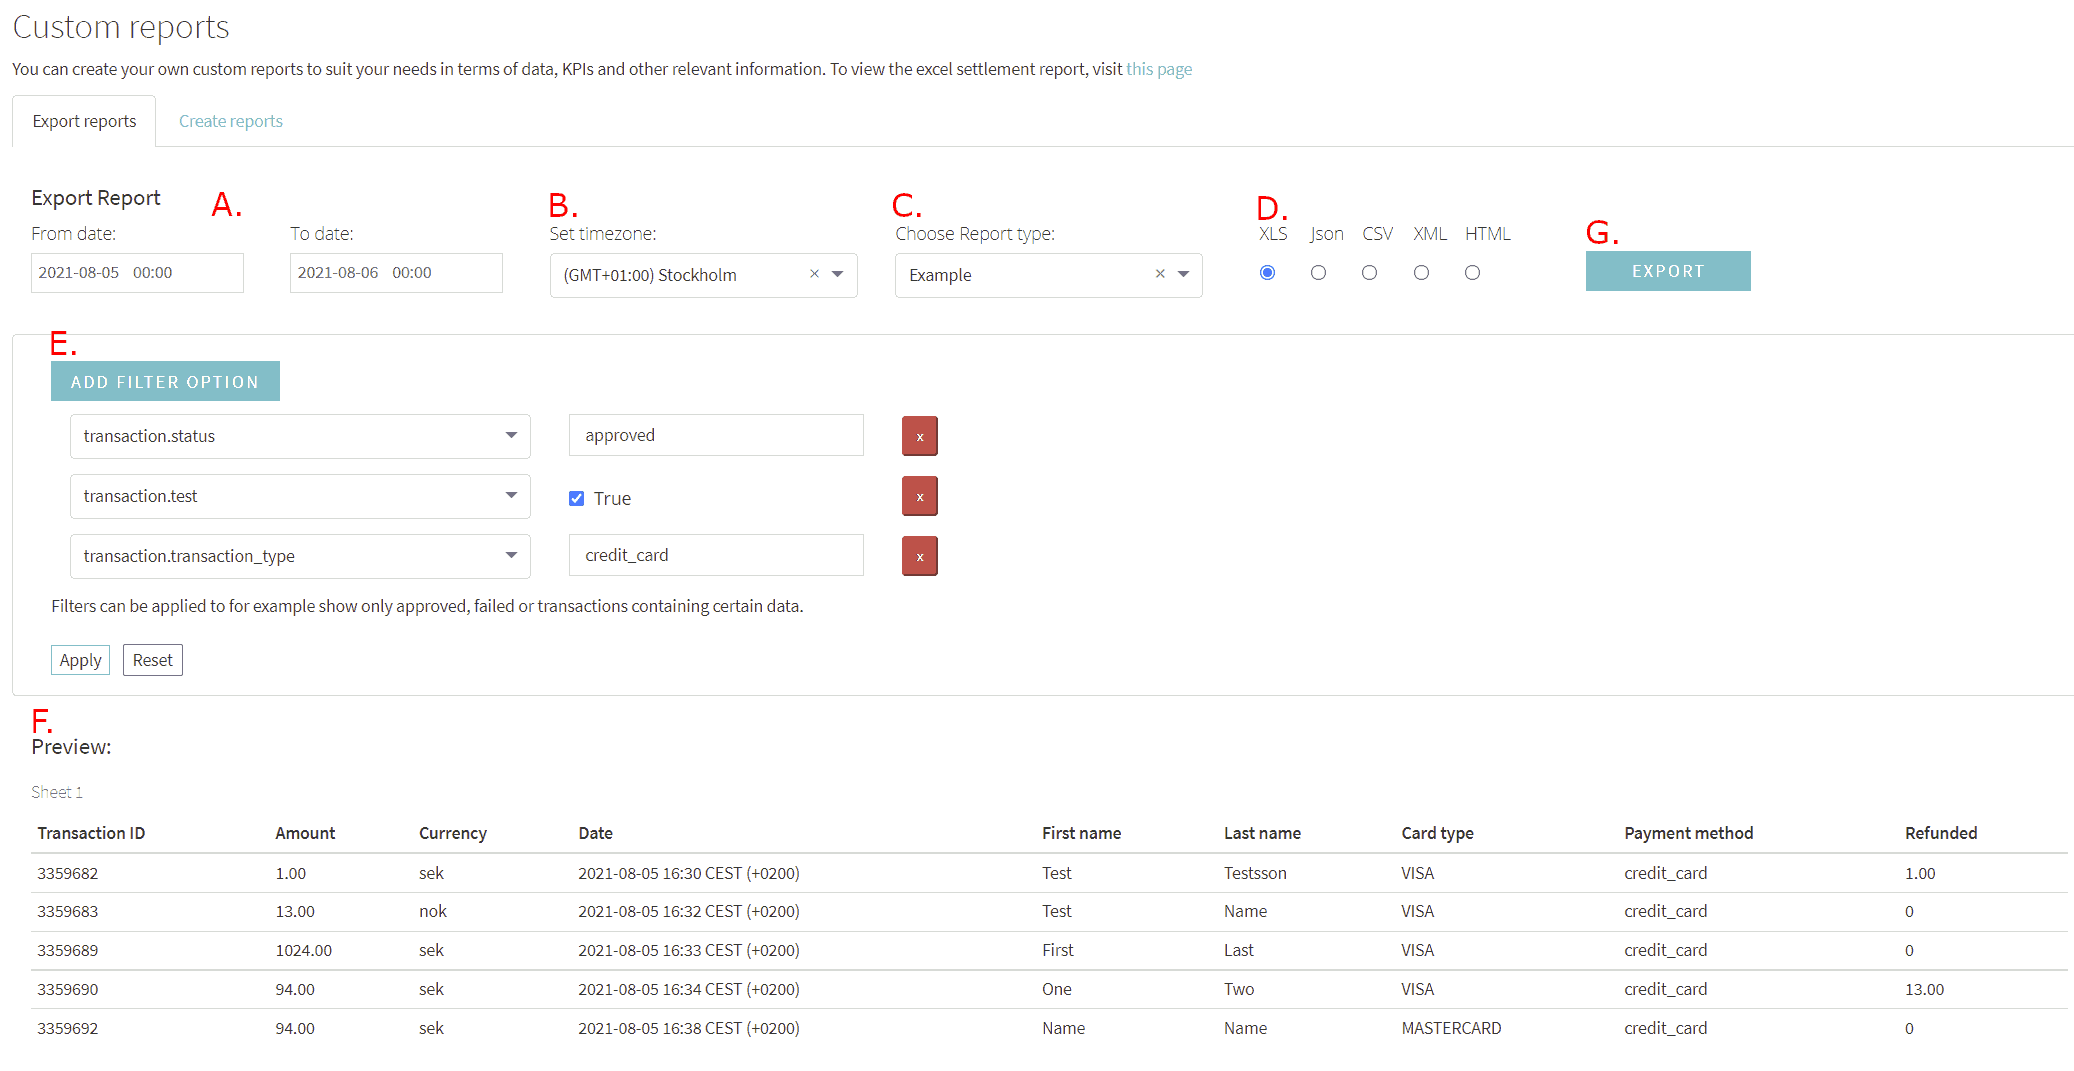
You should now see a report configuration page. Fill in the following:
-
A. Time Interval: Choose the date range for transactions to include.
-
B. Time Zone: Set the time zone for the selected interval.
-
C. Report Template: Select which template to use (see above).
-
D. File Format: Choose output format (default is .XLS).
-
E. Filters (optional): Add conditions to narrow down the data (see below).
-
F. Preview: View a sample of the report based on current selections.
-
G. Export: Click “Export” to generate and download the report.
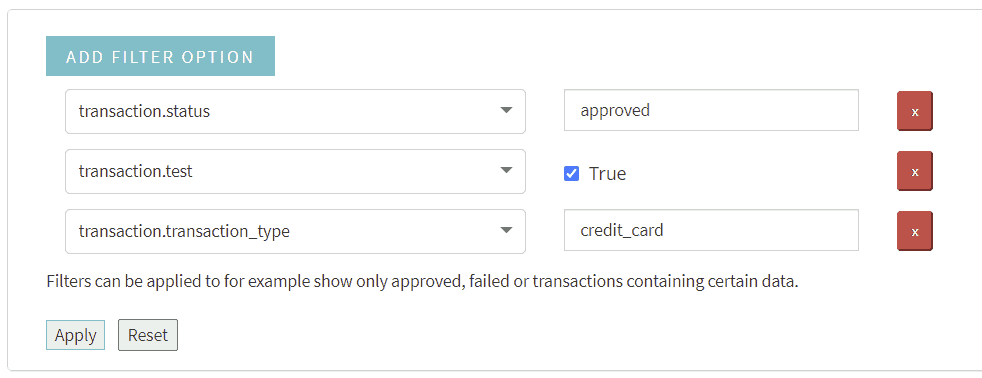
? Filters
Filters help you include only specific transactions in your report.
-
Click “Add filter option” to create a new filter.
-
You can add multiple filters.
-
To remove a filter, click the red button next to it.
Use the dropdown to select a filter field, or type to search for options.
Common Filter Options
-
transaction.status – Filter by status (e.g., only “approved” transactions).
-
transaction.test – Include only test transactions (check box) or only live ones (uncheck).
-
transaction.transaction_type – Filter by payment method (e.g., “swish”).
-
transaction.currency – Filter by currency (e.g., “eur”).
Once your filters are set, click “Apply” to activate them.
Click “Reset” to clear all filters.
You can click on the dropdown menu to see a selection of data to filter on. Alternatively, type in the dropdown menu to search for data options.
Some useful filter options:
Press "Apply" to apply the filters.
The "Reset" button will remove all filters.
Was this article helpful?
That’s Great!
Thank you for your feedback
Sorry! We couldn't be helpful
Thank you for your feedback
Feedback sent
We appreciate your effort and will try to fix the article