What is a Custom Report? A custom report is a downloadable file that contains a list of transactions based on criteria you define.
To control what data is included in the report, you use a report template. The template determines which transactions are included and what information (columns) will appear in the report.Creating a report template
🛠 Creating a Report Template
-
Log in to your Mondido account.
-
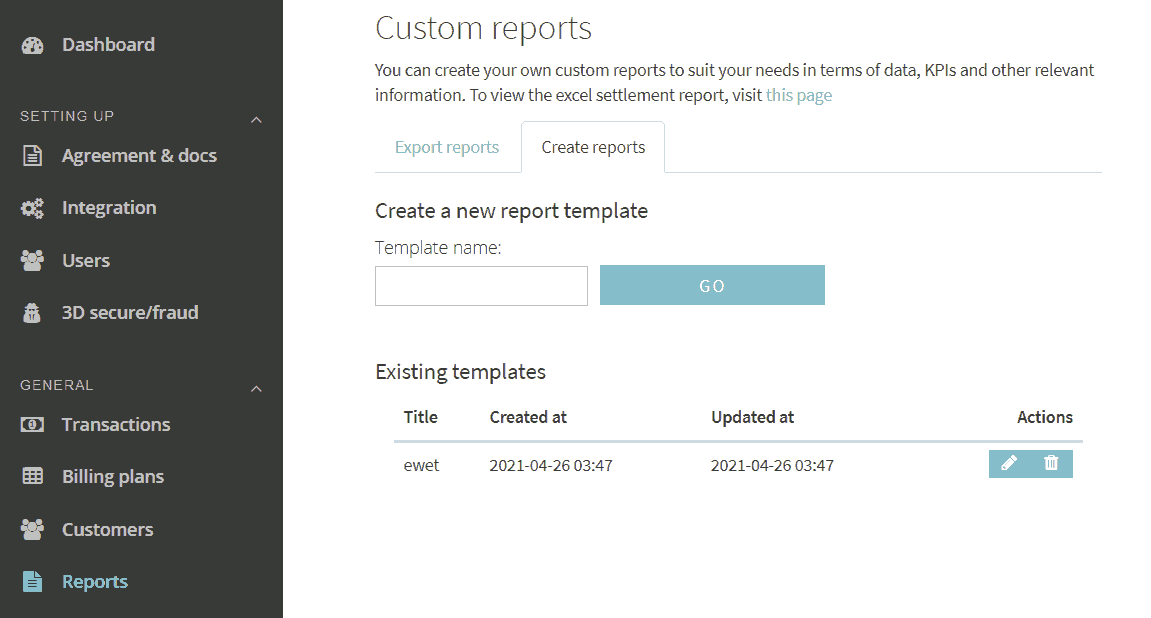
In the left-hand menu, click “Reports.”
Here, you can view your existing templates or create a new one.
To create a new template:
-
Enter a name in the “Template name” field.
-
Click “GO.”
If you already have templates, you can:
-
Edit them by clicking the pencil icon ✏️
-
Delete them using the trash can 🗑
🧩 Customizing Columns
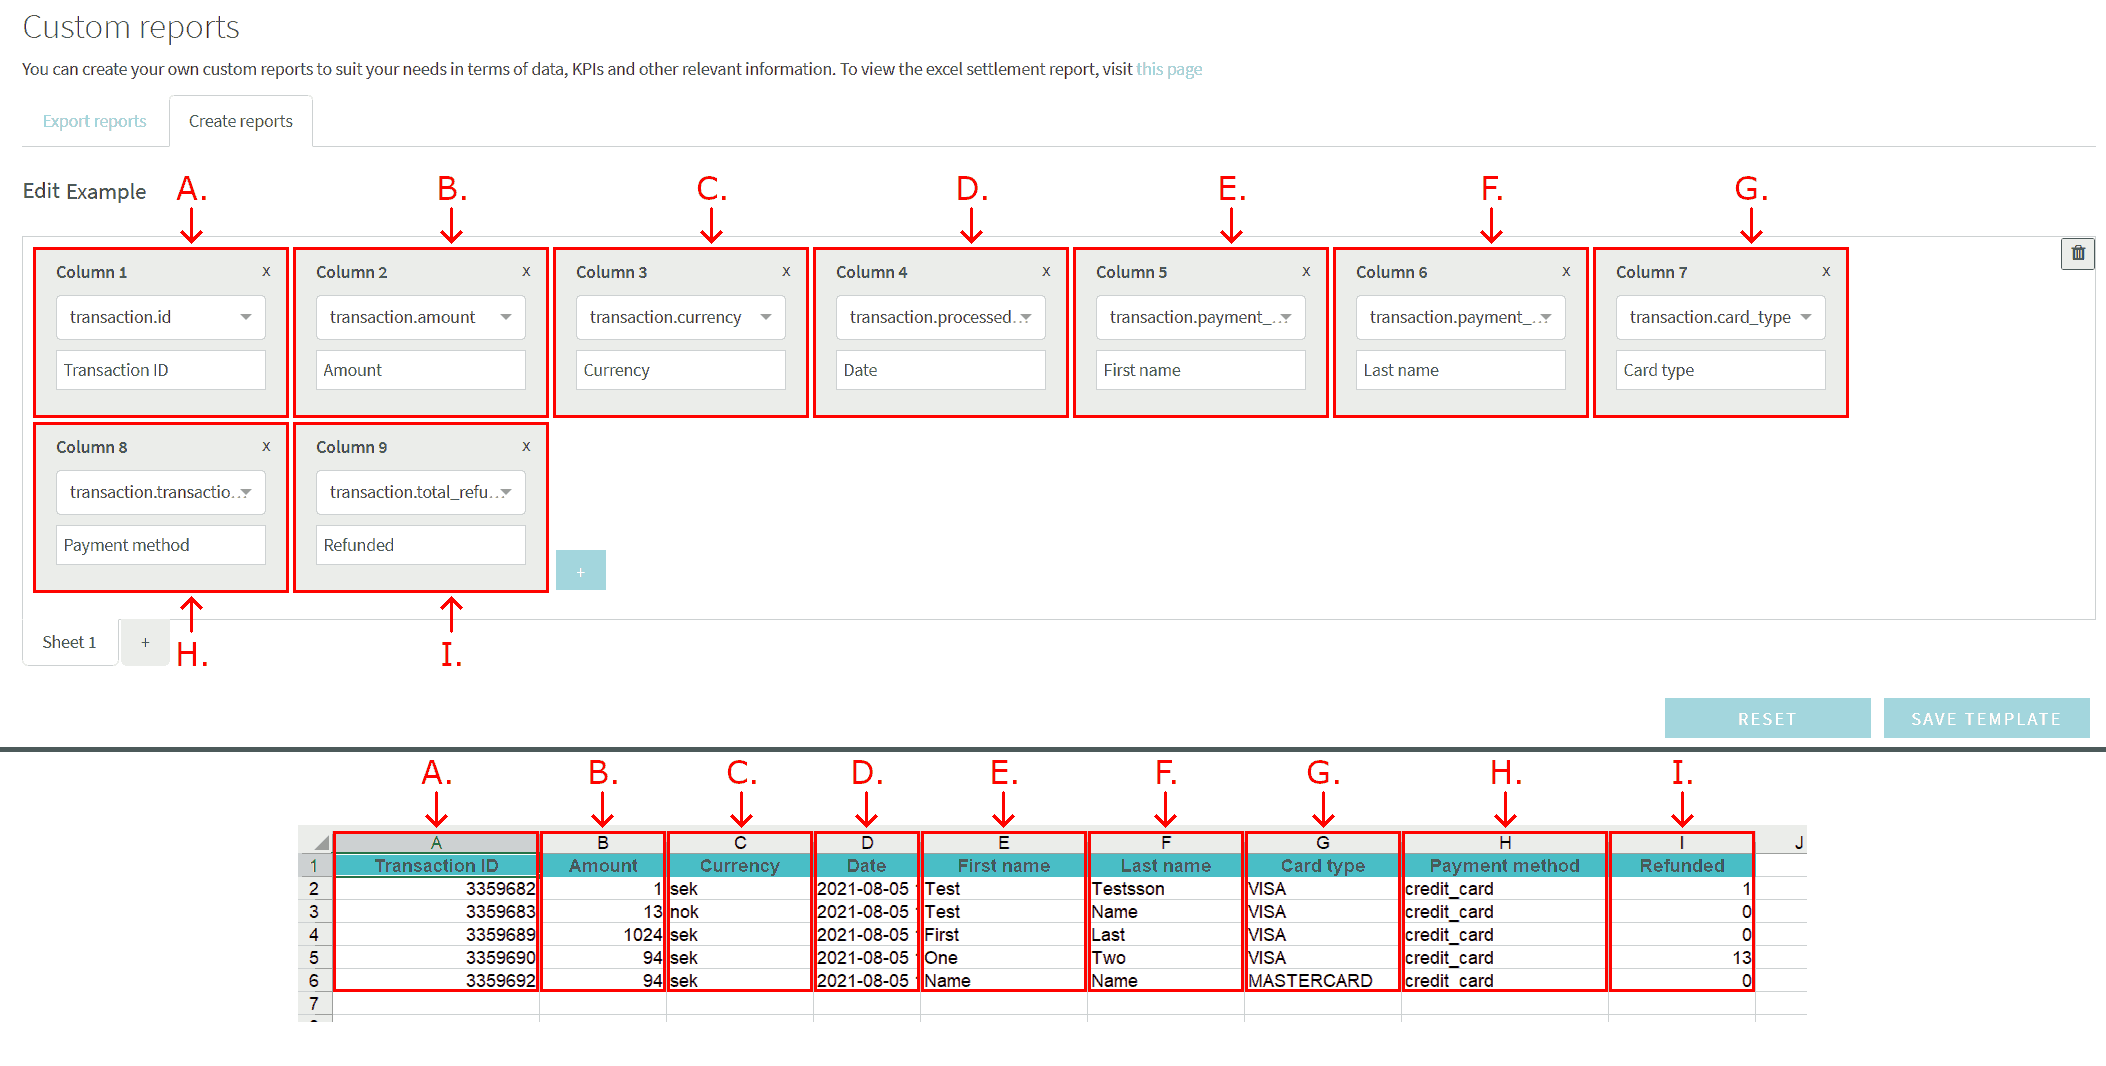
Each gray box labeled “Column” represents one parameter that will become a column in your report.
-
Add new columns by clicking the plus sign (+).
-
Change column order by dragging and dropping.
-
Delete a column by clicking the X in the top-right corner of the column box.
Each column pulls data from a dropdown menu of available transaction parameters. These match the fields you see in your transaction list.
🔗 Here’s a guide on how to fetch data from the transaction object
When you're done, click “Save template” to store your custom template.
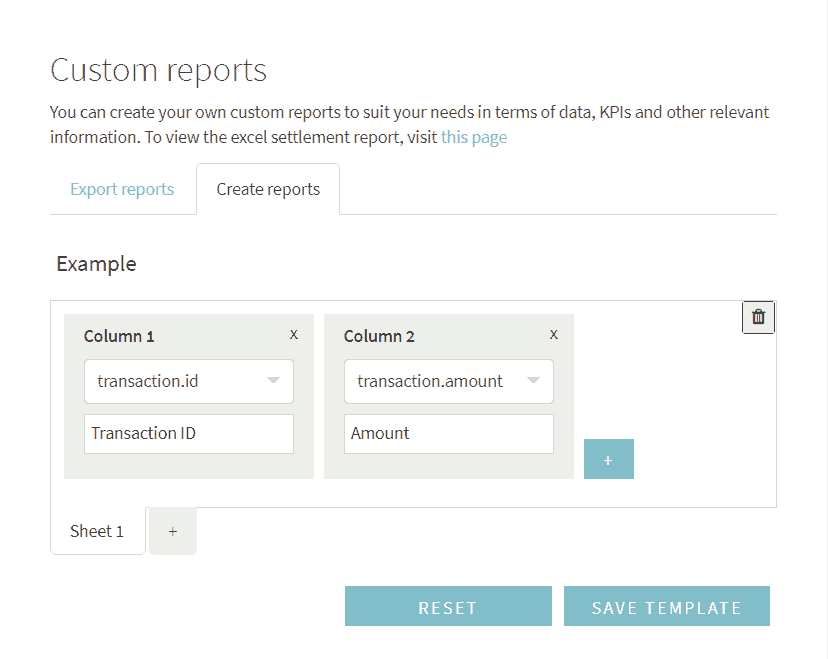 Each gray box titled "Column" represents a parameter that will become a column in the report. You can add more columns by pressing the plus sign button. The order of the columns can be changed by dragging and dropping them. To delete a column, press the x in the top right corner of the column box.
Parameters can be selected from a dropdown list. You can find these in the data of transactions from the transaction list.
Here's a guide on how to fetch data from the transaction object
Press "Save template" to save the template.
📊 Example Report
To help you get started, we’ve included an example template and its resulting report:
📤 Exporting Reports
Now that you have a template, here’s how to generate a report file:
-
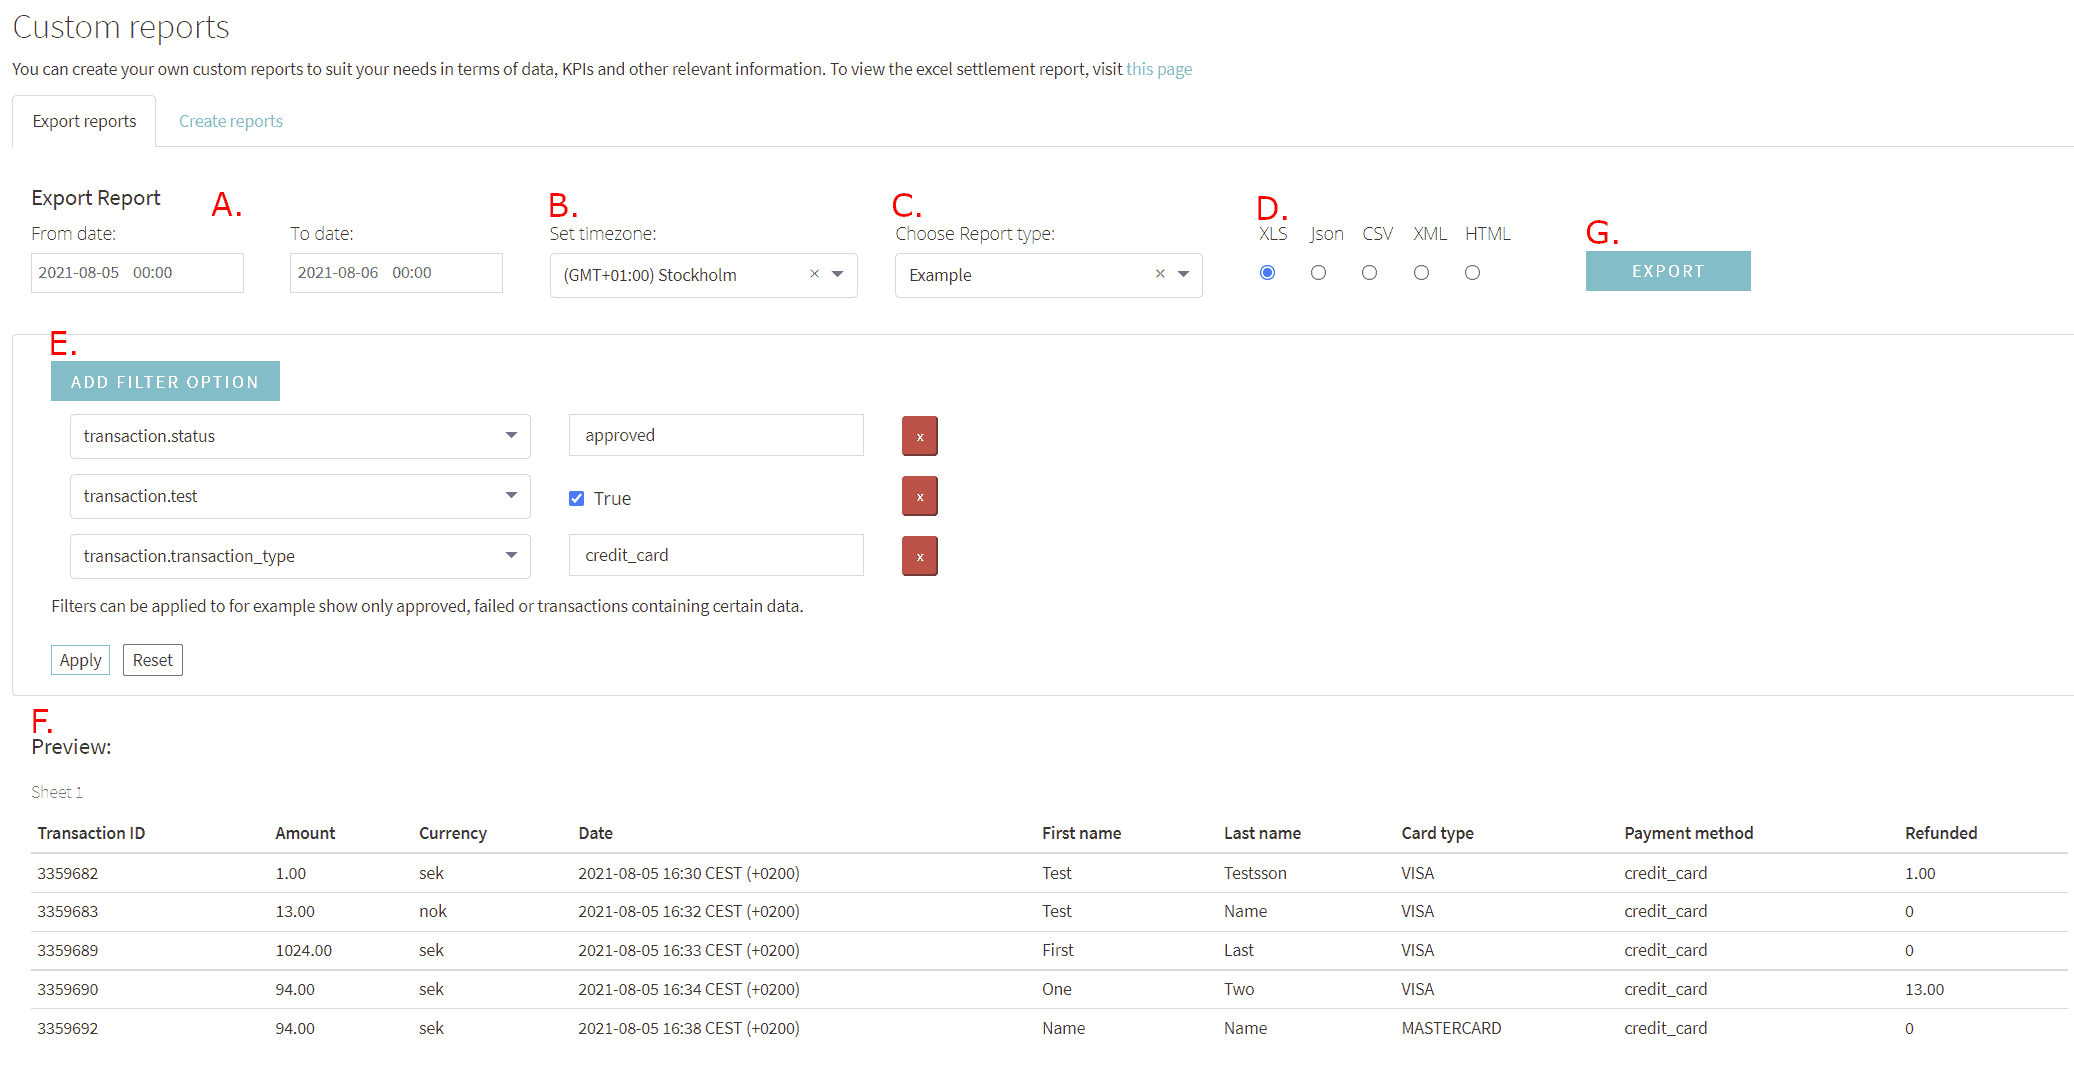
Go to the “Export reports” tab.
You should now see a report configuration page. Fill in the following:
-
A. Time Interval: Choose the date range for transactions to include.
-
B. Time Zone: Set the time zone for the selected interval.
-
C. Report Template: Select which template to use (see above).
-
D. File Format: Choose output format (default is .XLS).
-
E. Filters (optional): Add conditions to narrow down the data (see below).
-
F. Preview: View a sample of the report based on current selections.
-
G. Export: Click “Export” to generate and download the report.
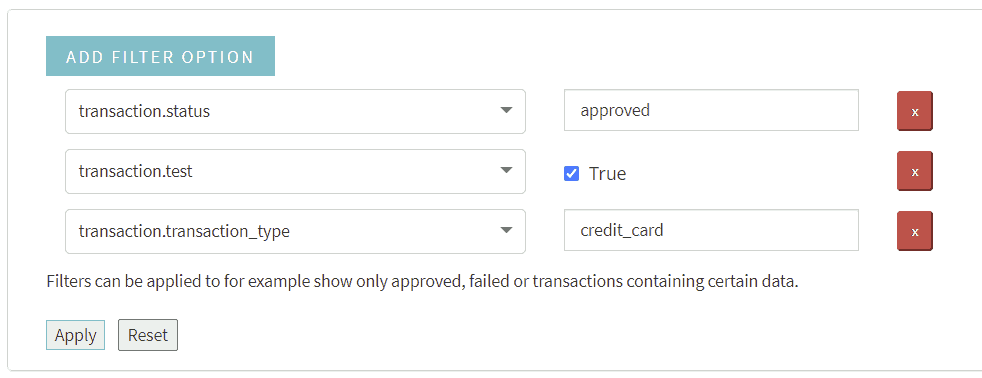
🔍 Filters
Filters help you include only specific transactions in your report.
-
Click “Add filter option” to create a new filter.
-
You can add multiple filters.
-
To remove a filter, click the red button next to it.
Use the dropdown to select a filter field, or type to search for options.
Common Filter Options
-
transaction.status – Filter by status (e.g., only “approved” transactions).
-
transaction.test – Include only test transactions (check box) or only live ones (uncheck).
-
transaction.transaction_type – Filter by payment method (e.g., “swish”).
-
transaction.currency – Filter by currency (e.g., “eur”).
Once your filters are set, click “Apply” to activate them.
Click “Reset” to clear all filters.
You can click on the dropdown menu to see a selection of data to filter on. Alternatively, type in the dropdown menu to search for data options.
Some useful filter options:
Press "Apply" to apply the filters.
The "Reset" button will remove all filters.